How to Make Easy Chocolate Covered Oreo Pops Recipe
This post may contain affiliate links. Please read my disclosure policy.
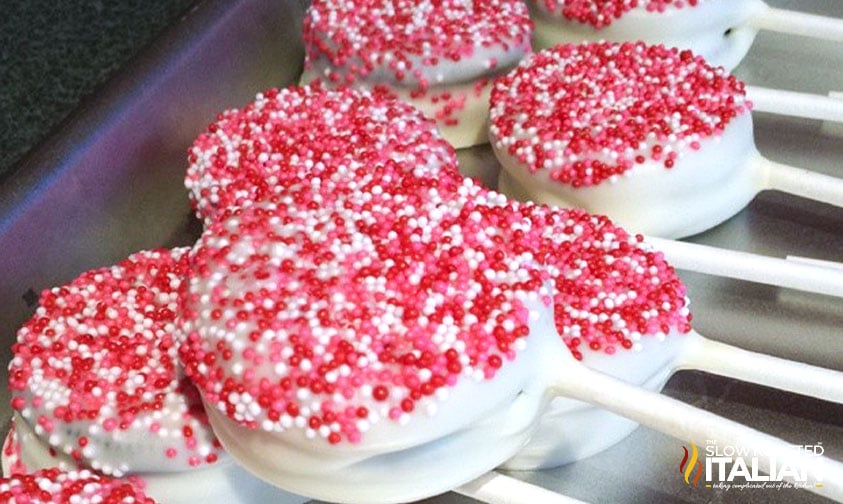
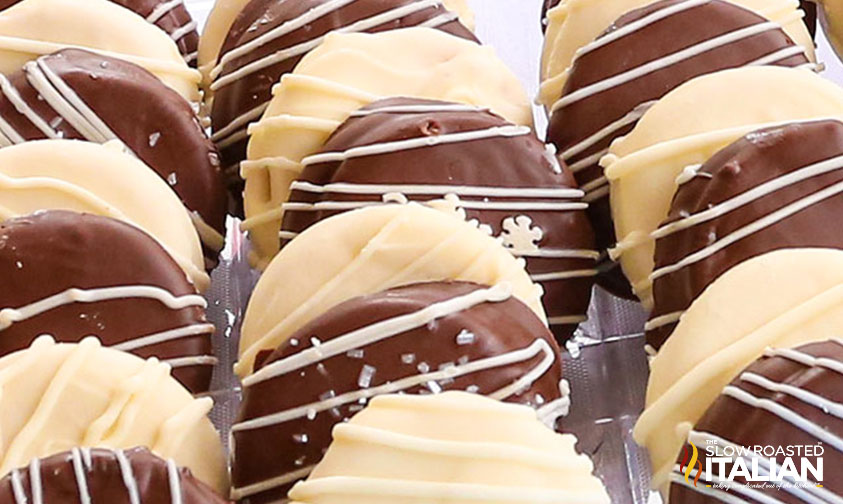
Oreo pops are super easy to make and a crowd favorite! Make this chocolate covered Oreos recipe for delicious, fun party treats or snacks.
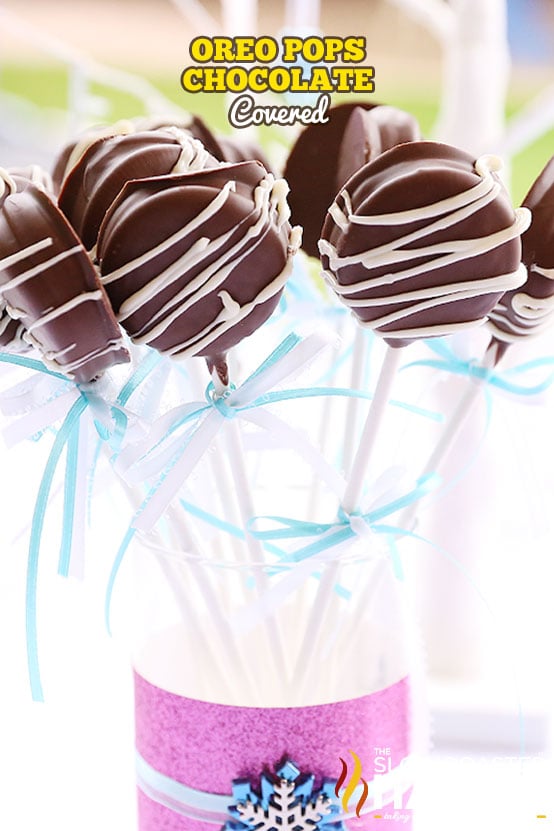
Crunchy chocolate cookies on a stick dipped into creamy candy coating – simple party snacks don’t get much tastier or easier.
Even better, these professional-looking party treats can be customized for any occasion!
Color your melting chocolate to match the theme or add different garnishes for a fancier touch.
There’s just something so fun about eating Oreo cookies covered in melted chocolate.
While you can keep these Oreo cake pops for special occasions, I think that they’re a great way to make a tasty treat anytime you want.
I keep candy sticks on hand for these Oreo cookie pops because they’re just that good! You can also make this recipe in small amounts if you don’t want to have a ton on hand.
These would be super fun to make for a themed party or to put a yummy spin on traditional cake pops.
New recipes like this show that Oreo cookies, melted candy, and festive sprinkles really can make quite the sweet treat!
Oreo Pops
Everyone loves these chocolate covered Oreos, but maybe you need a gluten-free option. If so, make marshmallow pops or frozen banana treats instead.
You could even serve all three treats for plenty of sugary goodness!
Or, make a big batch of crockpot candy in your favorite flavor and scoop it into festive cupcake liners to match your party theme.
Decorating Ideas
Instead of cutting shapes by hand, use fondant cutters to save some time. I like having multiple sets for letters and numbers (including lowercase!).
This way, you can easily customize the chocolate covered Oreos.
Sprinkles add a festive touch, and nonpareils come in a variety of color combinations. For a fancier look, try sanding sugar or holiday shapes.
You can also crush up extra Oreos or graham crackers and coat each pop in the crumbs.
Or, pipe a design instead! Simply melt down more Almond Bark and color it how you would like. Make a homemade piping bag by snipping off the corner of a Ziploc bag.
Notes and Tips for Making Chocolate Covered Oreos
- Prep decorations in advance.
Whether you are using sprinkles or fondant letters and shapes, have them ready to go before assembling the Oreo pops.
You will need to work quickly because the chocolate dries quickly, and if it is too dry, your decorations won’t stick. - Short on counter space?
Set the chocolate covered cookies on a parchment-lined baking sheet so you can move them to another location to dry.
- Use a gentle touch.
Twist the cookies apart gently and reattach them with the same care so they don’t break.
To be safe, you may want to purchase two packages so you have extras if needed. - Making Party Favors
Add simple packaging so guests can grab these on their way out the door!
Place a small cellophane treat bag over the top of each pop, then tie the base with a colorful ribbon. - Helping Oreo Pops Dry Faster
Line baking sheets with parchment or wax paper (instead of your counter) and pop each tray into the freezer once it’s full.
The treats should be fully set within 10 to 15 minutes.
To avoid condensation when serving, transfer the Oreo pops from the freezer to the refrigerator for at least 30 minutes before setting them out at room temperature.
This ensures that the cookie centers are soft enough to eat!
Supplies You Will Need
- Parchment paper or wax paper for easy clean up
- Tall glass cup – A 4 cup (or larger) glass cup makes for easier dipping, but any microwave safe bowl or even a tall drinking glass will do the trick!
- Lollipop sticks – You can typically find these in the baking or candy-making section of your local craft store.
Oreo Pops FAQ
As with any candy coating, powder or gel color is your friend! Add it while the almond bark is still hot so it blends smoothly.
Whatever you do, avoid using liquid food coloring. It causes melting chocolate to seize up (harden) and turn to a crumbly paste instead.
Before dipping the cookies into the chocolate coating, gently twist the cookies to separate them.
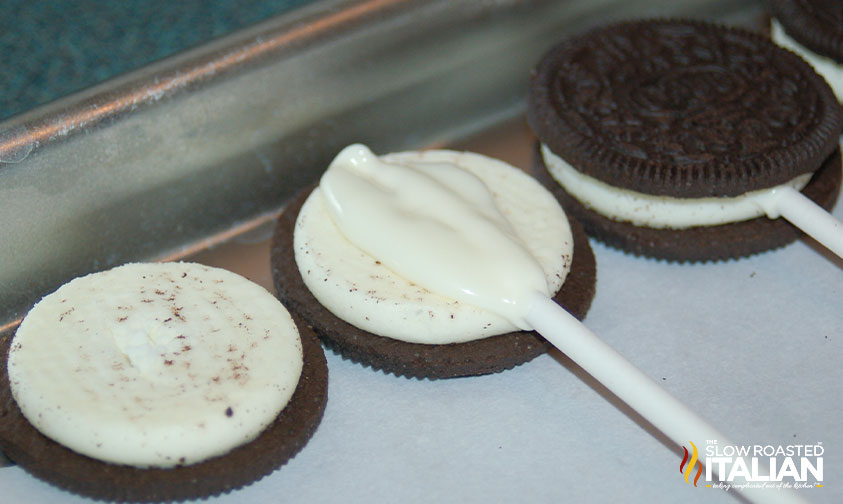
Gently press a lollipop stick into the cream, then place the cookie back together, with the stick in the middle.
To prevent the chocolate coating from melting, it’s best to keep the Oreo pops in an airtight container in the fridge. They’ll stay fresh this way for up to 3 weeks.
How long do Oreo Pops last?
Enjoy!
With love, from our simple kitchen to yours.
Don’t miss a thing! Follow us on
Facebook | Twitter | Pinterest | Instagram


How to Make Easy Chocolate Covered Oreo Pops Recipe
Equipment
- fondant optional
- fondant cutter if using fondant
Ingredients
- 20 Double Stuf Oreos, or your favorite sandwich cookie
- 24 ounces almond bark, chocolate or vanilla
Optional Decorations
- colored sprinkles, jimmies, or colored sugar
Instructions
- Prepare sprinkles or fondant letters prior to assembling Oreo pops.
- Line your counter top or large sheet pan with parchment or wax paper.
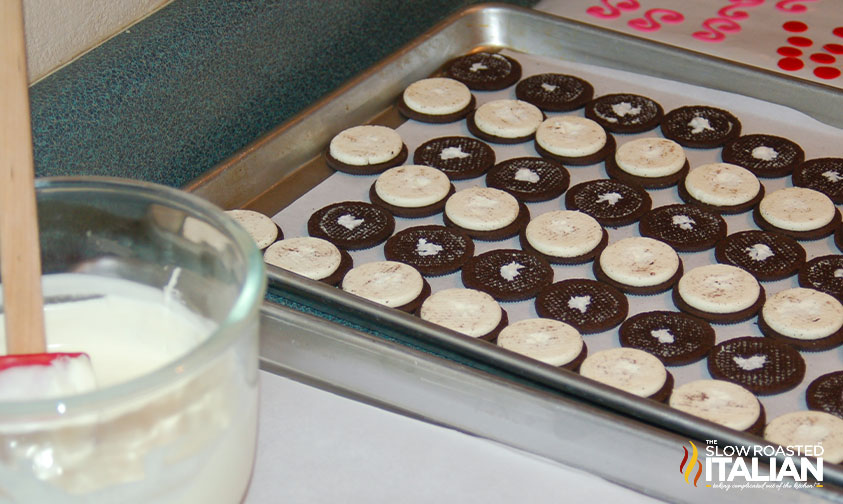
- Separate all of the sandwich cookies by gently and carefully twisting them apart. Place cookie halves with the filling in the top row and place the cookies with no filling off to the side.
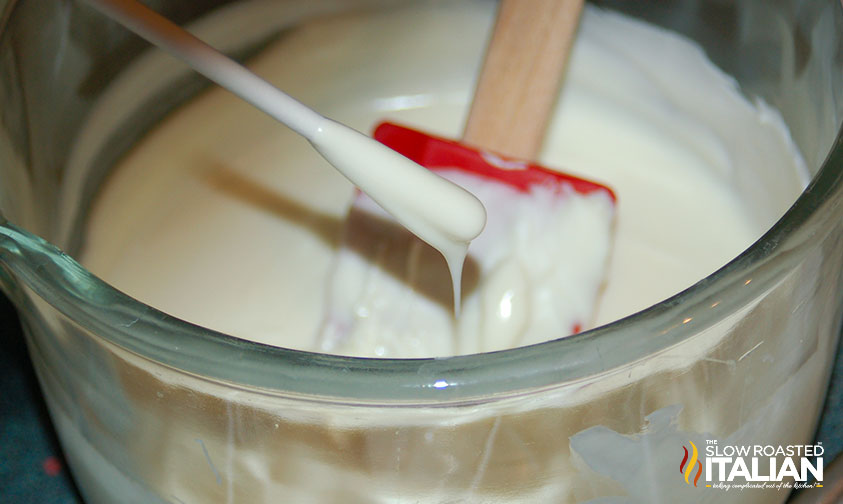
- Place half of almond bark (candy coating) in a tall microwave safe container I like to use a tall skinny measuring cup. It makes for easier dipping. Microwave for 30 seconds at a time, stirring between each interval, until bark melts completely.
- Dip one end of a lollipop stick in the melted candy coating. Gently press the coated lollipop stick into the cookie filling. Gently place a cookie top with no filling over the stick and carefully press down. NOTE: Using too much pressure will break the cookie. Then you will have to eat it and you may not have enough for your party. To be safe you may want to buy two packs.
- Repeat until all cookies have sticks in them. If there are any left over you can save them for later or eat them. I won’t judge. This is hard work after all.
- Allow the melted candy coating to set for a few moments.
- Check melted candy coating to be sure it is still very soft. If it firms up a little, pop it back in the microwave. Once your bowl starts to get low add more candy coating and melt.
- Dip one cookie pop into the melted candy coating. Swirl back and forth, carefully to ensure you have a good coating. You may want to gently tap the stick on the bowl to allow some of the coating to drip off before placing on your parchment paper.
- Place on parchment paper. Decorate with sprinkles if desired or place fondant cut outs on top at this point. You do not want to wait for the candy coating to dry or the sprinkles/fondant will not stick. If you are drizzling with chocolate you can wait until they dry.
- Repeat until all cookies are coated and decorated.
- Allow to set until dry. If you are bagging them, wait until they dry before placing cellophane bags over the top. Close with a ribbon.
- Serve and enjoy!
Nutrition
All nutritional information is based on third party calculations and is only an estimate. Each recipe’s nutritional value will vary depending on the ingredients used, measuring methods, and portion sizes.

Originally published April 2016, updated and republished May 2024
Disclosure: Posts may contain affiliate links. If you purchase a product through an affiliate link your price will remain the same and The Slow Roasted Italian will automatically receive a small commission. Thank you for supporting us, it helps us keep creating new recipes.


I love making cake pops at home, but never thought to try this. They were so yummy and my kids could not get enough of them.
My kids and I had a blast making these. They turned out perfect and were gone in minutes!
Hi Abigail!
We’re so glad you enjoyed.
TSRI Team Member,
Devlyn