
Cherry Cheesecake Lush Dessert
This post may contain affiliate links. Please read my disclosure policy.
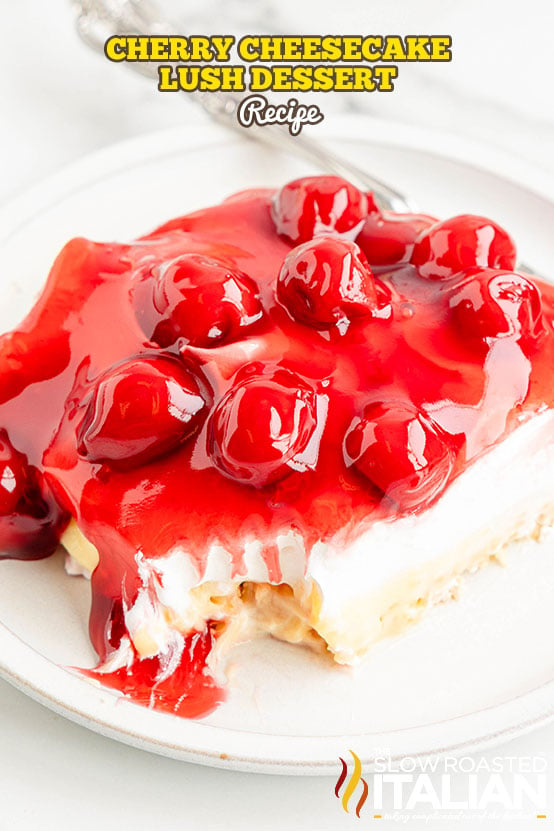
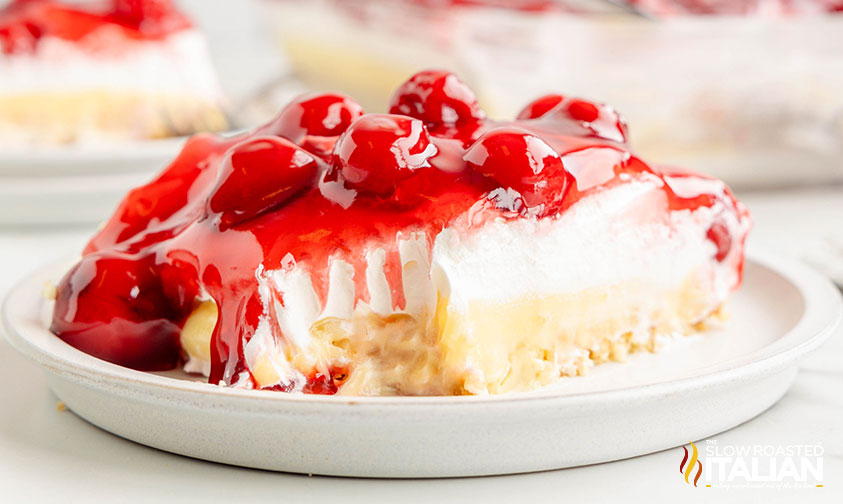
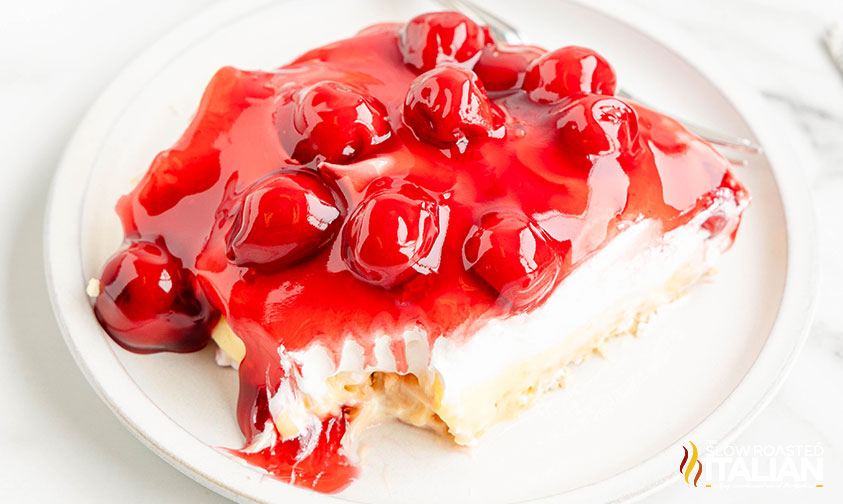
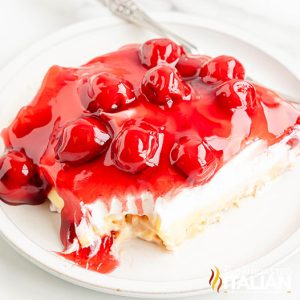
This Cherry Cheesecake Lush Dessert is full of fruity, cheesecake flavor! Layers of cheesecake-flavored pudding, Cool Whip, and cherry pie filling sit on top of a homemade Nilla wafer crust. Chilled in the fridge to set instead of baked, bring this no bake cherry lush cheesecake to your next party or get-together!
Cherry Cheesecake Lush Dessert
I love myself a no bake dessert… especially in the summertime! Honestly, on those really hot weeks, I don’t even like to turn my stove on.
That means salads as the main dish and desserts that don’t involve my oven at all!
That’s where recipes like this cherry cheesecake lush dessert come in super handy.
Not only do I make this on the regular for Chad and Munchkin, but I’ve also been known to bring it along to a barbecue or two.
It features all of the beauty of a cheesecake and cherry pie combined into one, gorgeous, no bake delight.
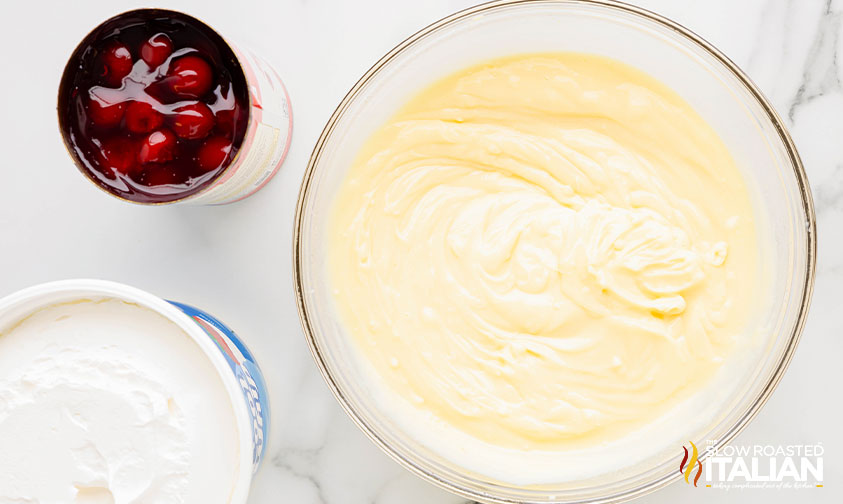
Now, just FYI there’s no cream cheese to be found here. I use cheesecake instant pudding instead, plus a layer of Cool Whip.
Paired with the Nilla wafers crust and cherry pie filling layers, it’s almost like a cherry cheesecake lasagna.
You’re going to want to try this one ASAP!
Ingredient Notes and Substitutions
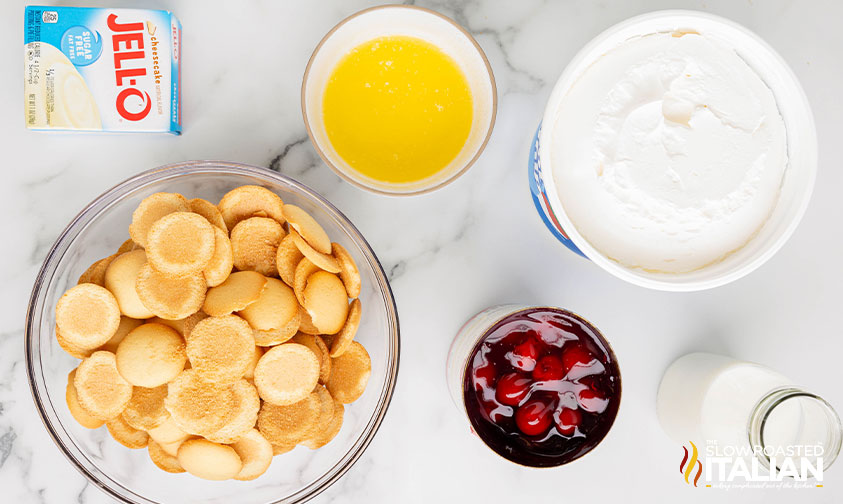
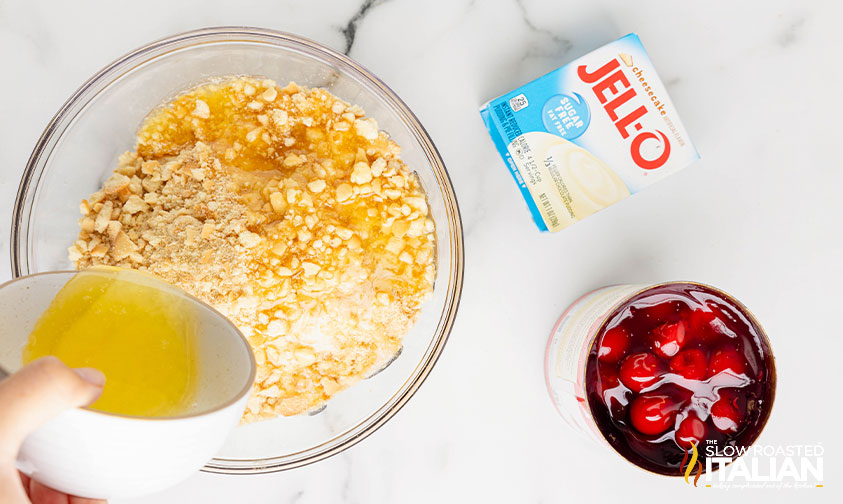
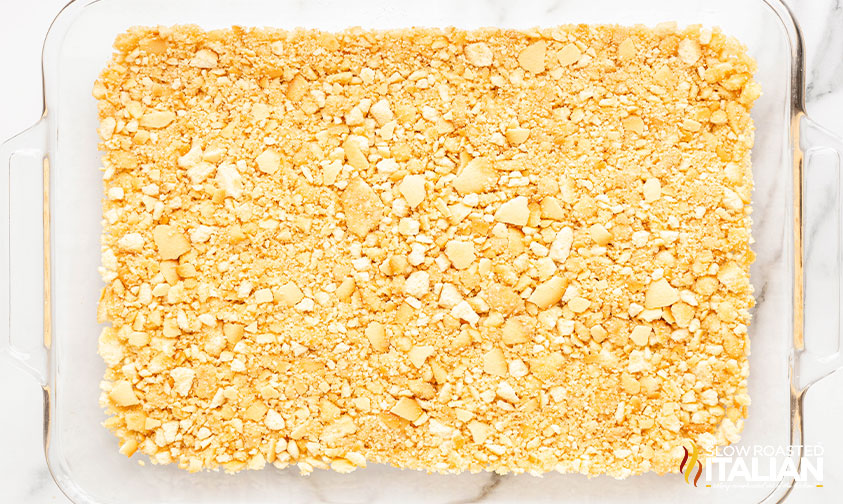
- Vanilla Wafers – The crunchy bottom layer of your cherry cheesecake lush! Combined with melted butter, it creates a really nice base for the rest of the ingredients.
- Butter – I like unsalted butter here. Make sure you melt it completely before adding it to the crushed Nilla wafers.
- Cheesecake Pudding Mix – I actually don’t use any cream cheese or sour cream in this recipe. Instead, I get that tasty cheesecake flavor from cheesecake pudding mix. Such an easy hack!
- Milk – Opt for whole milk for the creamiest results. But, if you only have skim or reduced fat on hand, those will work as well.
- Cool Whip – Adds a light and fluffy layer to help balance out the denser cheesecake section! I love Cool Whip… anyone else here guilty of eating a full tub in one sitting?!
- Cherry Pie Filling – Finally, here’s where the cherry flavor comes in! I’m using cherry pie filling in a can to make things super easy.
If you’re feeling ambitious, you could also make it yourself!
Tips and Tricks to Make the Perfect Cherry Lush Cheesecake
- Don’t overmix!
Remember that we’re using instant pudding mix in this cherry cheesecake lush dessert, and it’s important not to overmix it for the best texture.
Whisk the pudding mix along with the milk just until smooth — stop once it’s thickened. Overmixing can make the “cheesecake” layer go rubbery.
- Be careful as you layer.
When you add the cherry pie filling layer to your lush, go slowly so you don’t mess with the other layers too much.
I usually start in the middle and spread it outwards carefully with an offset spatula.
Now, if you’re not too attached to all of those separate layers, you don’t have to be as careful. But I personally just love the “lasagna” look of them!
- Consider chilling between each layer.
For those of you who are like me and love seeing those separate layers, you may want to let each one chill in the fridge for a while before adding the next one.
You already have to let the crust and pudding chill separately for at least 10 minutes before using.
After you’ve added those layers, add the Cool Whip on top, then place the baking dish in the fridge for 5-10 minutes.
Add the cherry pie filling next, then place the dish back in the fridge for the final chill.
You’ll have an overall much sturdier dessert when you take the time to let each component set!
- Let it set fully.
Speaking of chilling and setting, your cherry lush cheesecake needs to sit in the fridge for at least 3 hours before you slice and serve it.
If you have the time and the patience, overnight is better. It will give the flavors a chance to meld and the layers a chance to settle.
Prep Ahead
- Crush the Nilla wafers
- Melt the butter
Kitchen Tools You Will Need
- Small wooden dowel rolling pin – Perfect for small jobs like crushing up cookies! It’s also great for noodles, dumplings, and turnovers, and it even has a ruler on the rolling pin.
- Mixing Bowls – I like to have a variety of sizes on hand, and this set has them all.
- 9×13 Baking Dish – This set is one of my favorites! It comes with a lid for easy storage and is great for casseroles too.
- Whisk – These have held up for over 10 years and are still as good as the day I bought them. With 3 sizes, there is a whisk for every job!
- Offset Spatula – This spatula has so many uses and is perfect for smoothing the cherry pie filling on top of your lush.
Serving Suggestions
Serve your cherry cheesecake lush dessert immediately once it’s chilled and set!
It’s a wonderful party dessert option to take to potlucks, backyard barbecues, or even for the holidays.
If cherry isn’t your favorite, I also have a candy cane lush for the Christmas season and a Halloween lush for spooky parties.
And if you love a lush, you’ll love all of my cheesecake salad recipes too!
Storing Cherry Cheesecake Lush
If you have leftovers, store them in an airtight container in the fridge for up to 3 days.
The crust may start to soften as more time goes on — this is one of those dessert recipes that’s best enjoyed within the first few days.
While you can technically freeze cherry cheesecake lush for up to 2 months, I find the texture of the Cool Whip and pudding layers changes a bit when frozen and then thawed.
You can try it out to see how you like it… or simply whip up a fresh batch!
Cherry Cheesecake Lush Dessert FAQ
I was able to find it at my local grocery store with the other pudding mixes.
But if they don’t carry it where you live, grab some vanilla pudding mix and beat in half a cup of softened whipped cream cheese. It’ll give you a similar taste and texture!
Sure! I actually like to make this recipe the night before so the cookies are softened when I’m ready to serve.
Yes! You’ll need a 14.5 oz box to make cherry cheesecake lush.
Absolutely! If you’re not a fan of cherry, use your favorite. Blueberry or peach would be super tasty!
Enjoy!
With love, from our simple kitchen to yours.
Don’t miss a thing! Follow us on
Facebook | Twitter | Pinterest | Instagram
Cherry Cheesecake Lush Dessert
Equipment
- ziploc bag
Ingredients
- 11 ounces vanilla wafers
- 6 tablespoons butter, melted
- 2 boxes cheesecake pudding mix
- 3 1/2 cups milk
- 16 ounces cool whip
- 42 ounces 2 cans cherry pie filling
Instructions
- Add the wafers to a large ziplock bag and smash the wafers into crumbs using a rolling pin.
- In a medium mixing bowl, combine the wafer crumbs and butter. Press the crumb mixture into a 9×13 baking dish. Place the pan in the fridge for 10 minutes for the crust to set.
- Mix the pudding mix and milk in a medium mixing bowl until smooth. Allow the pudding to sit for 10 minutes.
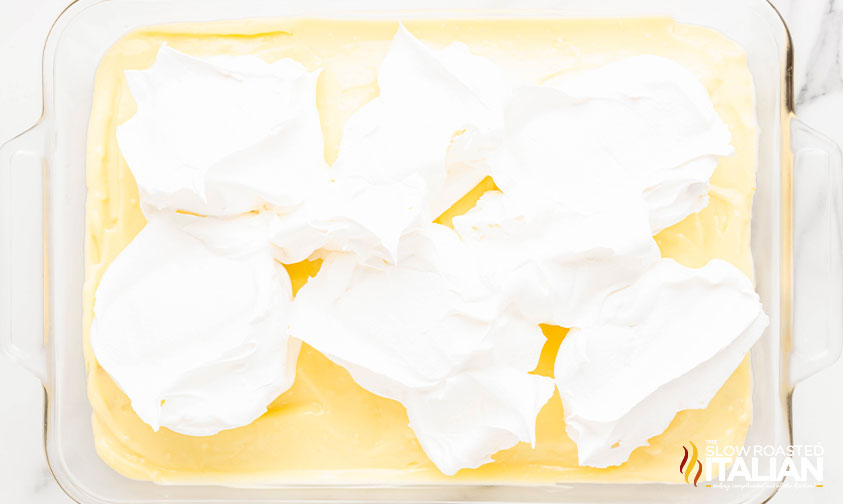
- Spread the pudding over the crust.
- Spread the Cool Whip over the pudding layer.
- Top the lasagna with the cherry filling.
- Placed in the refrigerator for at least three hours for the pudding to set.
Nutrition
All nutritional information is based on third party calculations and is only an estimate. Each recipe’s nutritional value will vary depending on the ingredients used, measuring methods, and portion sizes.
Originally published August 2024
Disclosure: Posts may contain affiliate links. If you purchase a product through an affiliate link your price will remain the same and The Slow Roasted Italian will automatically receive a small commission. Thank you for supporting us, it helps us keep creating new recipes.

The hardest part was waiting for it to chill! So creamy and delicious, and the cherry topping was perfect.
Hi Penelope!
Glad you enjoyed our recipe!!
TSRI Team Member,
Devlyn