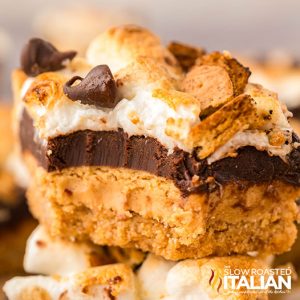
Chocolate Peanut Butter Graham Cracker Bars (S’mores Bars)
This post may contain affiliate links. Please read my disclosure policy.
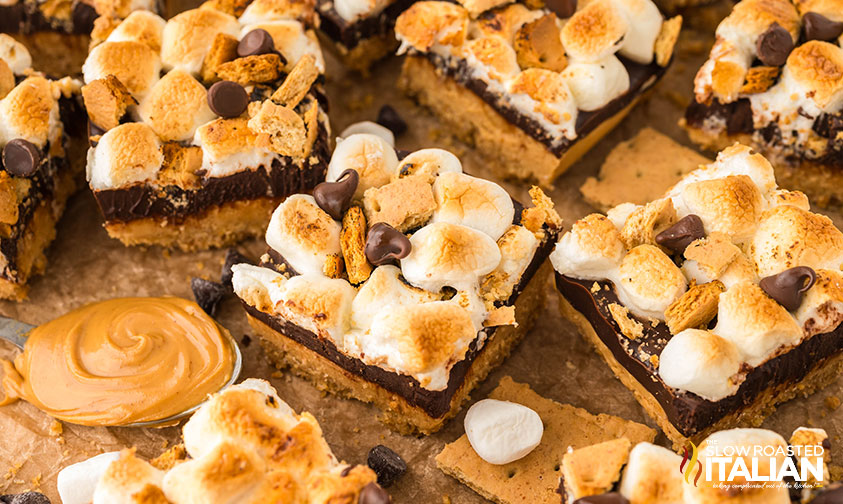
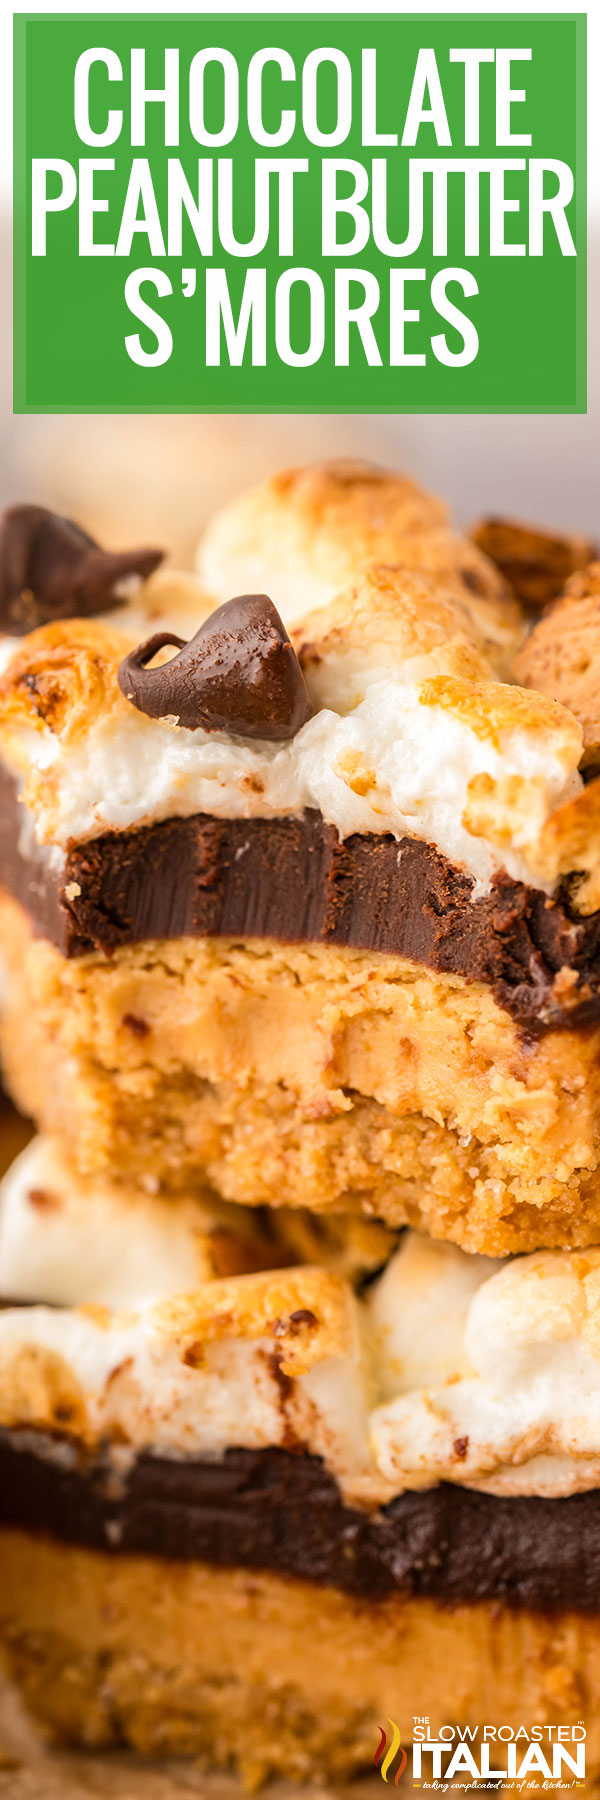
Chocolate Peanut Butter Graham Cracker Bars have a little bit of everything you love in a dessert. Layer after layer of crispy, creamy, fluffy goodness is packed into every bite. Plus, it only takes about 25 minutes to make them — the rest is cooling time!
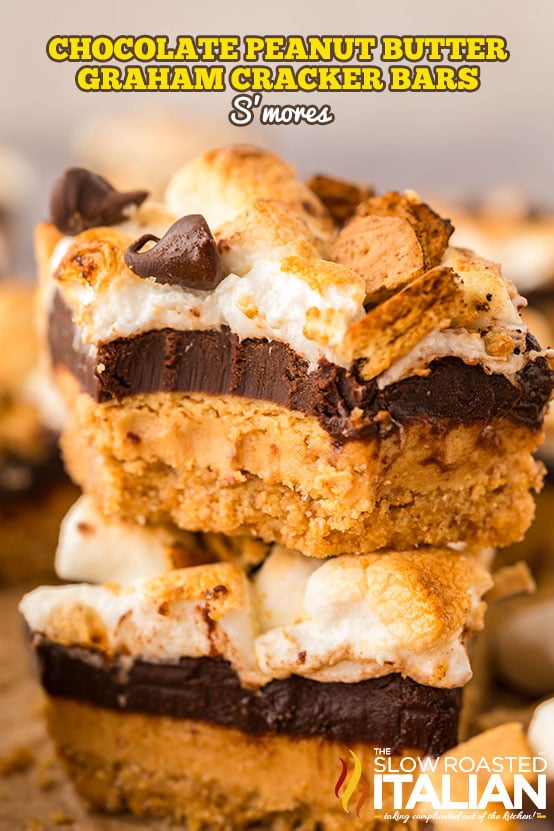
Table of Contents
Chocolate Peanut Butter Graham Cracker Bars
There’s a reason why I’ve got all kinds of s’mores dessert recipes — chocolate, graham crackers, and marshmallows just go so well together!
And when you add peanut butter into the mix? Simply *chef’s kiss*
My chocolate peanut butter marshmallow squares are thick, rich, and utterly decadent… just what you’re craving in a sweet treat.
There are all kinds of textures going on too, from fluffy and creamy to sandy and crunchy.
And in case these aren’t rich enough for your tastes, check out my peanut butter fudge frosted brownies and no bake Reese’s pie next!
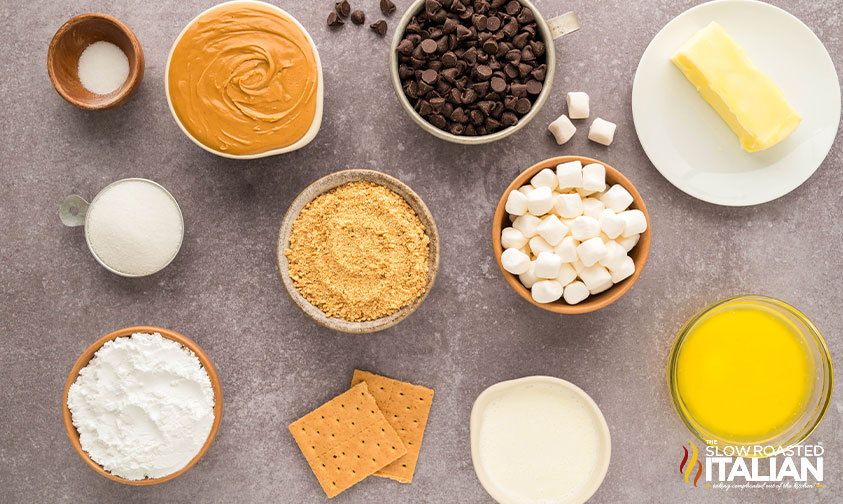
Ingredient Notes and Substitutions
- Graham Crackers – Use crumbs for the crust, then crush an extra sheet for the topping. You may be able to find the crumbs in the baking aisle, otherwise make them yourself.
Toss graham cracker sheets into a food processor and pulse until you get a sandy consistency. - Unsalted Butter – Melt half to make the crust, then soften the rest for the peanut butter filling. If salted sticks are all you have, omit the additional salt.
- Peanut Butter – I prefer to use creamy for the filling, but crunchy would add another texture to the mix! Or, mix chopped peanuts or crushed pretzels into the filling.
You can also substitute cashew or almond butter, or sun butter for a nut-free treat. Either way, make sure to grab a no-stir variety — it’s much easier to work with. - Granulated & Powdered Sugar – The granulated sugar sweetens the crust while the powdered sugar makes the peanut butter filling nice and fluffy.
- Heavy Cream – One-half of the smooth ganache layer. It helps to bring this to room temperature before heating it on the stove.
Simply measure it out and let it sit on the counter for 20-30 minutes. - Chocolate Chips – Semi-sweet have the perfect balance so these chocolate peanut butter graham cracker bars aren’t too sweet or too bitter.
You’ll need them to make the ganache and to sprinkle on top.
If you do need to swap them, I’d lean toward milk chocolate chips. Or, use milk chocolate for the ganache and dark chocolate for the topping. - Mini Marshmallows – For the gooey, toasted topping that ties this s’mores treat together!
In a pinch, you can cut up larger marshmallows, but the topping won’t look quite the same.
Tips and Tricks to Make Perfect Peanut Butter S’mores Bars
- Line the pan well for easier removal.
You want there to be some overhang of the parchment paper so you can lift the bars straight out of the pan.
Either cut two different pieces and layer them in the pan to hang over each side, or use one large piece of parchment and press it down into the pan.
Crumple it into a ball to make it easier to tuck it into the corners.
You’ll also want to lightly grease the top of the parchment so it’s easier to peel away from the chocolate peanut butter graham cracker bars.
I usually spritz the pan first too to help hold the paper in place.
- Allow the dessert to cool for at least 1 hour.
There’s a lot of melty, gooey stuff happening in all of those layers, and a little downtime helps everything set up nicely.
If you try to slice into the dessert too soon, everything will seep out the sides and your bars will fall apart.
- Use a large, sharp knife for slicing.
Because you’ll be cutting through multiple gooey layers, it’s best to wipe the blade clean between cuts.
It also helps to run the knife under hot water to heat the metal, then dry thoroughly before slicing.
The heat makes it easier to cut through each layer of the peanut butter s’mores bars without the knife sticking as much.
Prep Ahead
- Crush graham crackers into crumbs
- Make peanut butter filling
Kitchen Tools You Will Need
- 8×8 Pan lined with Parchment Paper
- Mixing Bowls – I like to have a variety of sizes on hand, and this set has them all.
- A sturdy silicone spatula can be used for scraping, stirring, and smoothing and is easy to clean too!
- Electric Hand Mixer – I’ve had this one in my kitchen forever, and it still works beautifully.
- Small Saucepan – The easiest way to heat cream quickly and evenly.
Serving Suggestions
Enjoy these chocolate peanut butter marshmallow squares with a cozy mug of hot chocolate or coffee.
Or, mix up a batch of mudslides for a girls’ night in with your friends!
Storing and Freezing Leftovers
Transfer any leftover peanut butter s’mores bars to an airtight container and store at room temperature for up to 5 days.
Marshmallows get a little funky in the freezer, but you could assemble the layers and freeze the uncut bars without the toppings if needed.
Use within 1-2 months for best results.
Thaw in the refrigerator, then add the toppings and toast the marshmallows just before slicing and serving.
Chocolate Peanut Butter Marshmallow Squares FAQ
If you want to double this recipe for chocolate peanut butter graham cracker bars, use a 9×13-inch baking pan.
You could also use a 9×9-inch pan for a single batch, but the layers won’t be as thick.
Position the oven rack at least 6 inches away from the broiler and keep a close eye on your dessert. It only takes a minute or two to toast the marshmallows.
If you’re still worried, consider using a kitchen torch to toast them by hand. You’ll have better control over how dark they get and will be able to see the topping a lot easier.
These peanut butter s’mores bars can be made up to 2 days ahead of time. After assembling the layers, store uncut bars tightly covered in the refrigerator.
Add and toast the mini marshmallows and graham cracker pieces just before serving. And don’t forget the extra chocolate chips!
Enjoy!
With love, from our simple kitchen to yours.
Don’t miss a thing! Follow us on
Facebook | Twitter | Pinterest | Instagram


Chocolate Peanut Butter Graham Cracker Bars (S’mores Bars)
Ingredients
For the crust:
- 1 1/2 cups graham cracker crumbs, about 10–12 whole sheets
- 1/4 cup granulated sugar
- 6 tablespoons unsalted butter, melted
For the peanut butter filling:
- 1 cup creamy peanut butter
- 6 tablespoons unsalted butter, softened
- 2 cups powdered sugar
- pinch of salt
For the ganache layer:
- 12 ounces semi-sweet chocolate chips, about 2 cups
- 1/2 cup heavy cream
Toppings:
- 1 cup mini marshmallows
- 1 sheet graham crackers, crumbled into coarse chunks
- 1/4 cup semi-sweet chocolate chips
Instructions
- Prepare the Pan: Preheat the oven to 350°F. Line an 8 x 8-inch pan with parchment paper, leaving overhangs for easy removal. Lightly grease the parchment paper.
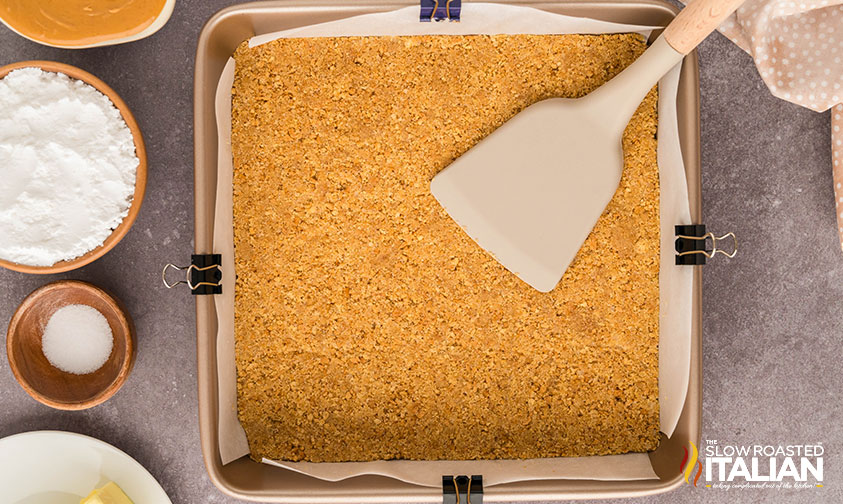
- Make the Crust: In a mixing bowl, combine the graham cracker crumbs, granulated sugar, and melted butter. Mix until evenly moistened.
- Press the mixture firmly into the bottom of the prepared pan using the back of a spatula or the bottom of a measuring cup. Bake for 10 minutes, then set aside to cool slightly.
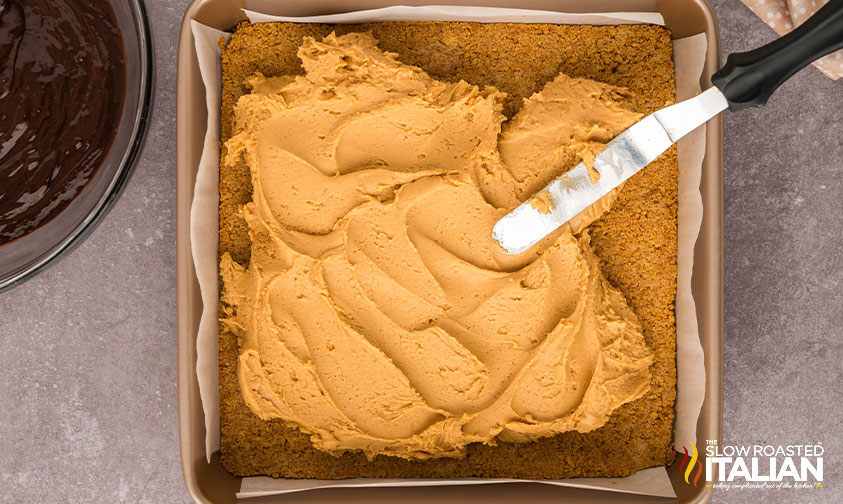
- Prepare the Peanut Butter Filling: In a medium mixing bowl, combine the peanut butter, softened butter, powdered sugar, and a pinch of salt. Use an electric mixer to blend until smooth and creamy, scraping down the sides of the bowl as needed.
- Spread the filling evenly over the cooled crust.
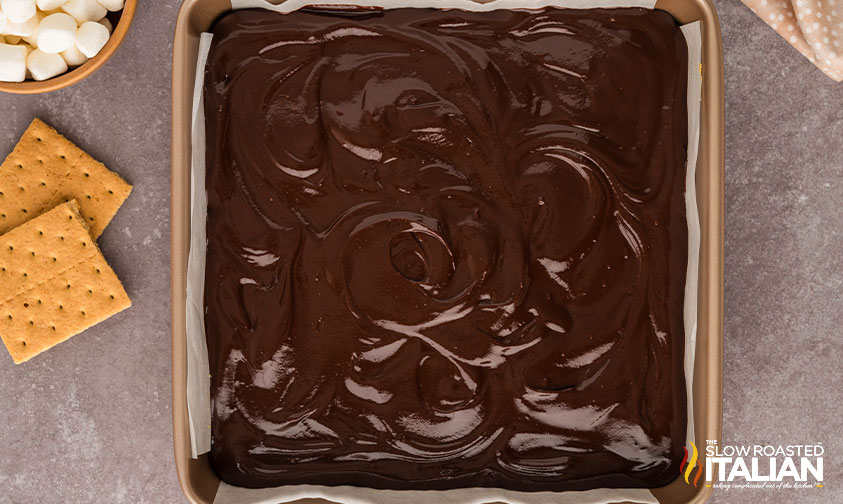
- Make the Ganache: In a small saucepan, heat the heavy cream over medium heat until it begins to bubble slightly.
- Place the chocolate chips in a heatproof bowl and pour the hot cream over the top. Let sit for 1 minute, then whisk until smooth and glossy. Spread the ganache over the peanut butter layer, smoothing it evenly with an offset spatula.
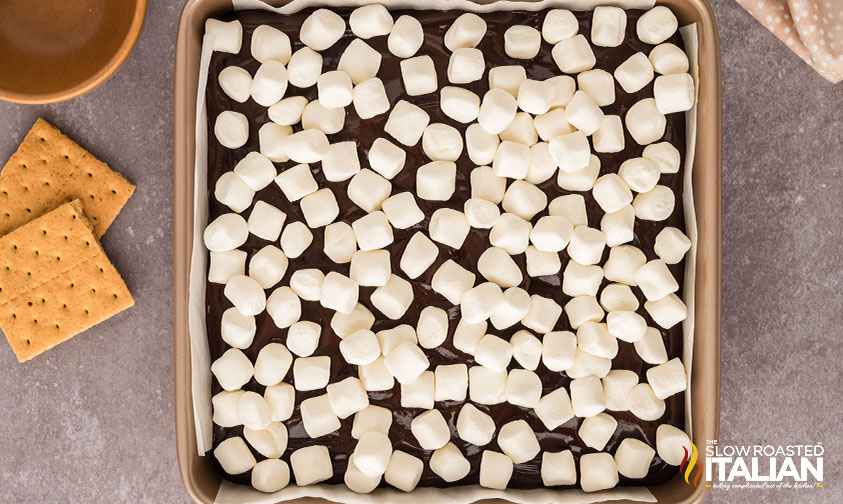
- Add Toppings: Top the ganache with mini marshmallows and crumbled graham crackers. Place under the broiler for 1–2 minutes, watching carefully to toast the marshmallows and graham crackers to your liking.
- Cool and Slice: Let the bars cool at room temperature for 10 minutes. Sprinkle with additional chocolate chips. Allow to cool completely for at least 1 hour before slicing into 16 squares. For clean cuts, use a sharp knife warmed under hot water and dried between cuts.
Donna’s Notes
Nutrition
All nutritional information is based on third party calculations and is only an estimate. Each recipe’s nutritional value will vary depending on the ingredients used, measuring methods, and portion sizes.
Originally published March 2025
Disclosure: Posts may contain affiliate links. If you purchase a product through an affiliate link your price will remain the same and The Slow Roasted Italian will automatically receive a small commission. Thank you for supporting us, it helps us keep creating new recipes.


Welcome!
We’re Donna and Chad, the dream team behind The Slow Roasted Italian. Our focus is on taking complicated OUT of the kitchen. Life is busy enough, making meals should be fast and easy, to help make your life as simple as possible. Read More >>