

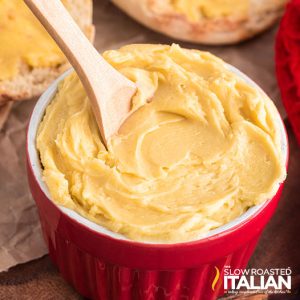
Maple Butter
This post may contain affiliate links. Please read my disclosure policy.
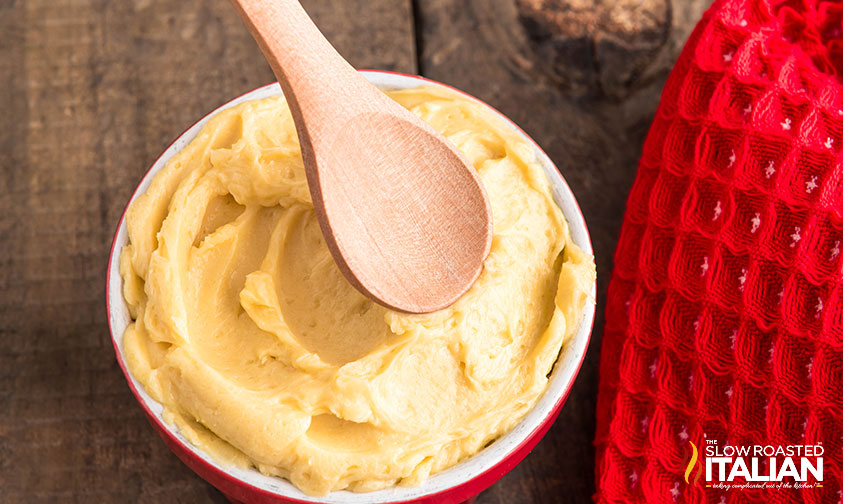
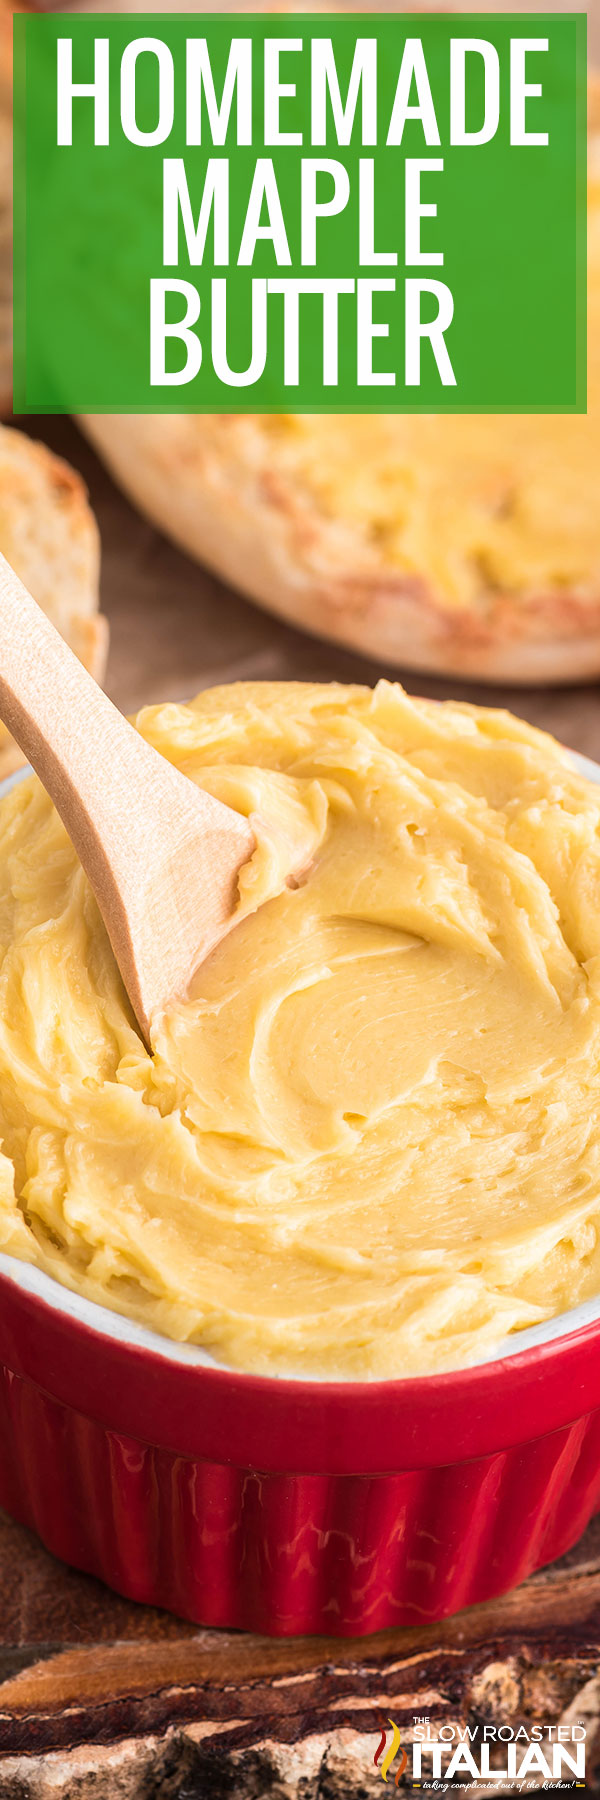
Homemade Maple Butter is so easy to make! All you need are 3 simple ingredients and about 25 minutes to prep, make, and chill and you’ll be snacking on some maple-y goodness. Learn how to make maple butter, what to serve it on, and why it makes for such a great gift with my guide!
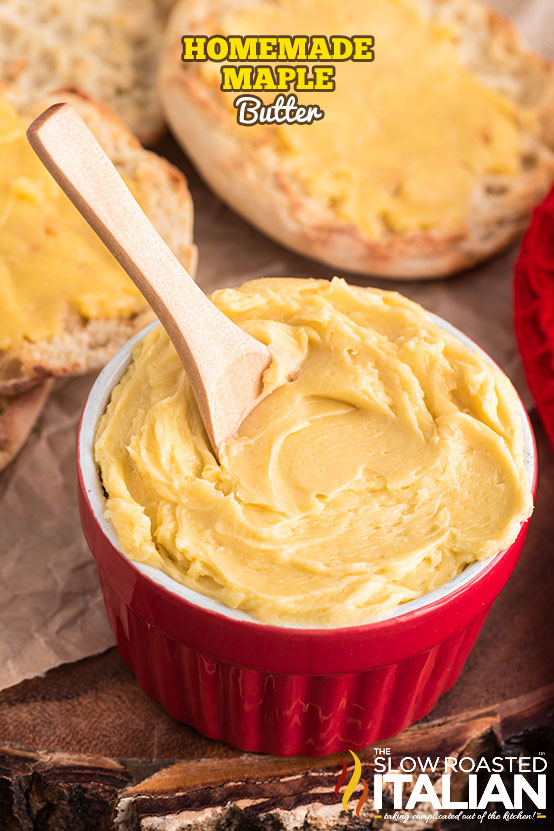
Table of Contents
Maple Butter
Is there anything better than giving and receiving gifts that you can eat? As you can imagine…in my opinion, not really!!
Whenever I’m stuck on a gift option, the wheels start turning: what can I whip up in the kitchen?
Not only is it a lot more affordable than running out to the store, but it’s also a lot more meaningful for most people.
If someone made me a gift from scratch, I would feel so honored!
Maple butter is one of my favorite gifts to give, especially during colder weather months.
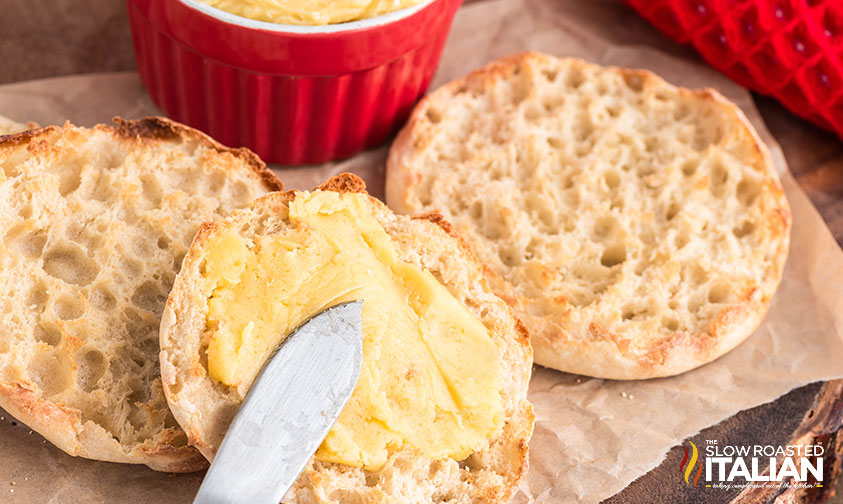
You can make this recipe for yourself to keep at home — it instantly elevates normal old toast or English muffins — or you could give some away as a gift.
It looks so cute in mini mason jars or you can get ambitious and shape it into little logs.
No matter how or why you decide to make my maple butter recipe, I’m certain of one thing: you’re going to love it!
Need some more edible gift ideas? I love to gift my mixed berry jam, white chocolate popcorn, and homemade hot fudge too!
Ingredient Notes and Substitutions
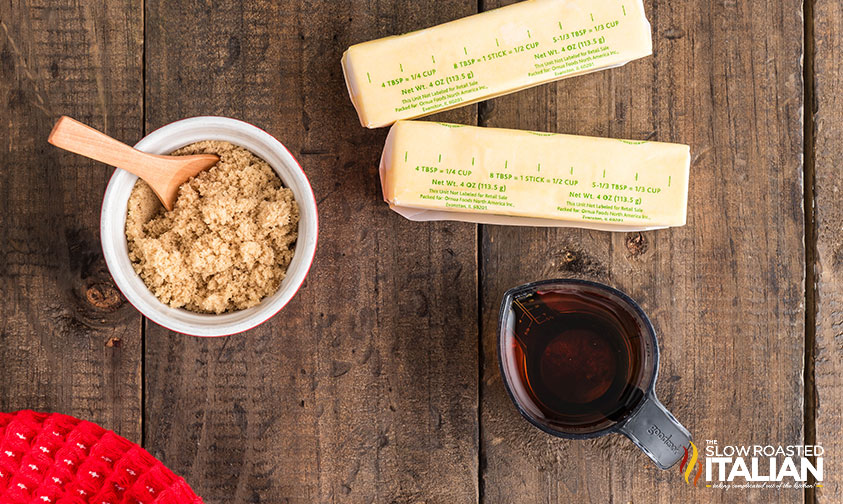
- Butter – I use salted butter, but you can use unsalted if you prefer a mellower flavor!
Try to find high-quality butter, as you’ll notice the difference in taste and texture in the final results. - Brown Sugar – This gives the butter an amazingly deep, caramel-like flavor that I just adore.
You could technically use white granulated sugar instead… but bear in mind, you won’t get the same robust taste as with brown.
- Maple Syrup – Opt for pure maple syrup for this recipe — it boasts a natural and rich flavor that you just won’t get with pancake syrup!
Again, you don’t need a lot of ingredients to make this recipe, so make the ones you do use count.
You can choose either Grade A or Grade B. Keep in mind that maple syrups vary by brand and grade.
Darker syrups (like Grade A) have a more robust maple flavor, whereas lighter syrups (like Grade B) boast a more delicate taste.
How to Make Maple Butter Tips and Tricks
- No boiling required.
Many other maple butter recipes will call for you to boil maple syrup down until it turns into a butter-like consistency.
That’s more like a maple cream — still delicious, but not a butter… at least in my opinion!
Maple syrup butter is made with actual butter, like in my recipe.
- Play with the sweetness.
The best part about making this sweet butter yourself is that you have full control over the sweetness levels!
If you’re not sure how sweet you want it, start with less brown sugar and add more as you taste and adjust.
Remember: you can always add more sugar but you can’t take it away once you add it. Work slowly and carefully and taste, taste, taste!
- No mixer, no problem.
While this maple butter recipe is certainly a lot easier to pull off with a stand mixer or hand mixer, you can also make it without any fancy equipment.
You’ll need a sturdy whisk and a lot of elbow grease to do it, but it’s possible!
- Easily double or triple.
You might as well make the most of your time in the kitchen and whip up some extra!
Store it in the freezer for future use, or offer it as a fun gift for the holidays, housewarmings, and more.
Just make sure that your mixing bowl is large enough to hold all of the ingredients, and that you adjust the mixing time.
You’ll need to mix it for longer to get the smooth consistency you’re after!
Prep Ahead
- Soften the butter
Kitchen Tools You Will Need
- Stand Mixer or large mixing bowl with Hand Mixer for whipping up your butter.
- A sturdy Silicone Spatula can be used for scraping, stirring, and smoothing and is easy to clean too!
- Measuring Cups and Spoons – You may be tempted to eyeball the amounts, but I recommend using the proper tools so it comes out just right.
- Mason Jar – I absolutely love these and use them for storing, prepping, drinking glasses, and canning.
Serving Suggestions
What to serve with this maple butter recipe? The better question would be… what not to serve with it?
I love using it on English muffins, toast, pancakes (how good would it be on these cinnamon streusel pancakes too?!), waffles, French toast, or even as a topping on baked sweet potatoes.
It’s also so fun to use in baking, and I’ve been known to sneak a small spoonful straight from the jar sometimes… no judgment, please!
Remember that maple syrup butter also makes for a great gift. Pack it into some small mason jars or food-safe decorative containers with lids.
Attach a small label or note with storing instructions — store in the fridge to keep it fresh!
Storage and Reheating
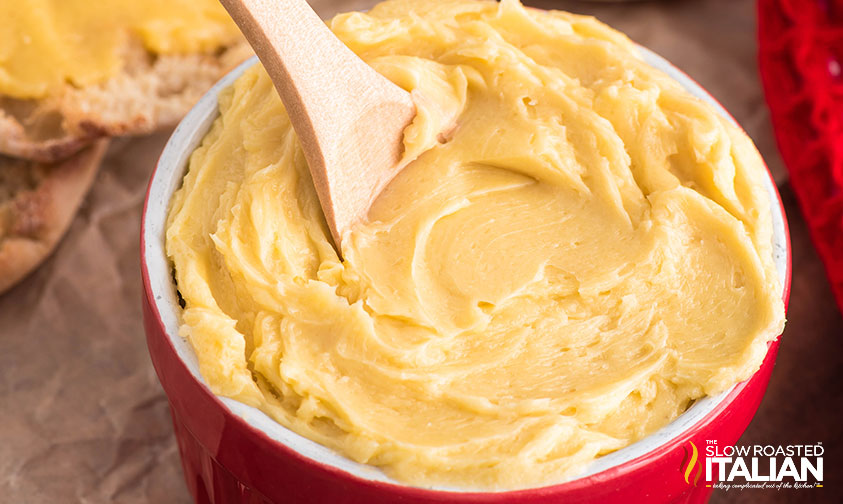
When stored in an airtight container in the fridge, maple butter will keep for 2 weeks, or even up to a month! Make sure it’s well-covered to keep it fresh and flavorful.
If you find that it starts to separate, simply whisk or beat until everything is well combined again.
You could try heating it up in the microwave for about 10 seconds too — gentle warmth can also help it re-emulsify.
Maple Butter Recipe FAQ
Glad you asked, as there seems to be a lot of confusion around the two!
Maple cream is pure maple syrup that has been boiled down until it reaches a creamy consistency. Some recipes add a bit of extra oil too.
Instead, maple butter is made by combining maple syrup with butter. Now, you know!
The key is to use softened butter and to thoroughly mix to combine! Gradually incorporating the syrup into the butter while stirring or beating continuously will help too.
Make sure to store the butter in the fridge to maintain its consistency.
You need to make sure to stir and beat without stopping until the butter is well combined and the texture uniform. Another thing to note is to use fresh, pure maple syrup.
If it’s on the older side, the syrup may be naturally grainy as the sugars start to form crystals. Older syrups are typically still safe to eat, but the texture does vary a bit!
Enjoy!
With love, from our simple kitchen to yours.
Don’t miss a thing! Follow us on
Facebook | Twitter | Pinterest | Instagram
Maple Butter
Ingredients
- 1 cup 2 sticks salted butter, softened
- 1/4 cup brown sugar
- 1/4 cup pure maple syrup
Instructions
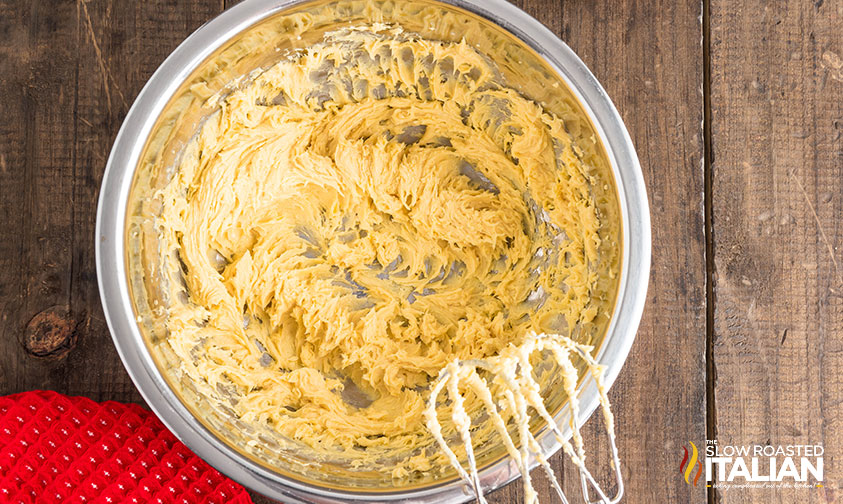
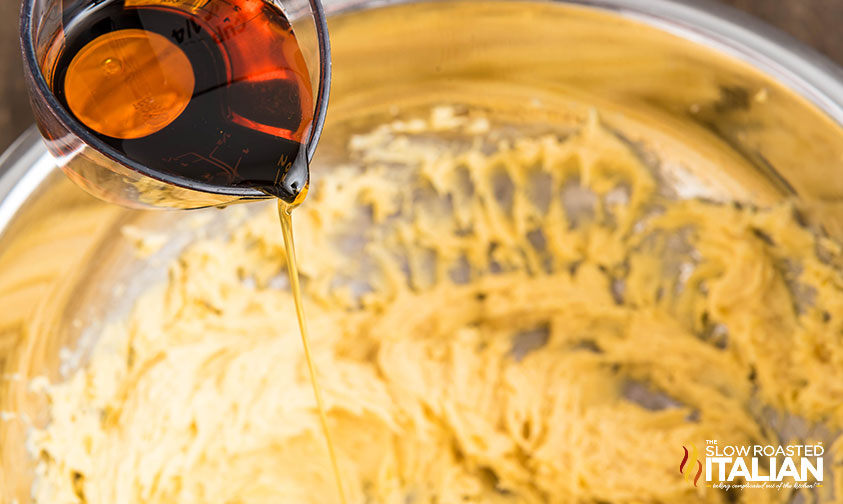
- In a medium bowl, use an electric mixer or a wooden spoon to blend the softened butter and brown sugar. Slowly add in the maple syrup as you continue to mix. Beat until combined well and the texture is uniform.
- Transfer the maple butter mixture to a storage container, cover, and chill in the refrigerator for about 15-20 minutes. The butter should firm up, but still be a spreadable consistency.
- OPTIONAL: After 20 minutes, you can shape the butter into a log using wax paper. Chill for an additional 30 minutes to an hour, or until the desired firmness is reached. This is great for slicing.
- Use your maple butter on english muffins, toast, pancakes, sweet potatoes, or even in your baking for a touch of maple sweetness.
Donna’s Notes
Nutrition
All nutritional information is based on third party calculations and is only an estimate. Each recipe’s nutritional value will vary depending on the ingredients used, measuring methods, and portion sizes.
Originally published June 2024
Disclosure: Posts may contain affiliate links. If you purchase a product through an affiliate link your price will remain the same and The Slow Roasted Italian will automatically receive a small commission. Thank you for supporting us, it helps us keep creating new recipes.


Welcome!
We’re Donna and Chad, the dream team behind The Slow Roasted Italian. Our focus is on taking complicated OUT of the kitchen. Life is busy enough, making meals should be fast and easy, to help make your life as simple as possible. Read More >>


This maple butter is so easy to make and absolutely delicious. Perfect on my morning toast!
Hi Maya!
We’re so glad that you enjoyed the recipe.
TSRI Team Member,
Devlyn