Valentine’s Day Heart Sugar Cookies
This post may contain affiliate links. Please read my disclosure policy.
These Heart Sugar Cookies are just right for Valentine’s Day, whether as a romantic gift or a classroom treat! Soft, tender, and buttery, you’ll want to make these cut out sugar cookies by the dozen. Plus, you’ll find sugar cookie heart decorating tips and ideas so yours come out picture-perfect!

Table of Contents
Heart Sugar Cookies
Everyone makes cookies for Christmas, but what about the other holidays?
I’ve already got the cutest bunnies for Easter, but it’s time for an even sweeter treat — hearts for Valentine’s Day!!
Now, that doesn’t mean you couldn’t make this recipe for another romantic occasion… maybe an anniversary or a special date.
With so many sugar cookie heart decorating ideas to choose from, you can customize this dessert to suit any occasion.
Pair with sweet strawberry ice cream, a creamy milkshake, or a warm mug of hot chocolate!
Ingredient Notes and Substitutions
- Flour – All-purpose flour is all you need to make these adorable treats! You should be able to use a gluten-free blend for this recipe, but the texture may be a bit different.
- Baking Powder – Double acting so your cookies come out thick and chewy. Make sure yours is fresh — it should bubble and fizz when mixed with warm water.
- Sugar – You’ll need granulated sugar for the dough and powdered sugar for the icing.
- Unsalted Butter – A staple for any baking recipe. If salted butter is all you have, omit the additional salt in the recipe.
- Vanilla & Almond Extract – This mixture creates the absolute best flavor for sugar cookies! Feel free to substitute imitation almond extract if allergies are a concern.
Or, try a different flavor like strawberry or lemon! - Meringue Powder – Our secret weapon for stable, quick-drying icing.
While similar to egg white powder, this contains extra stabilizers that are much needed — so check the label carefully before you buy. - Gel Food Coloring – Thicker and more concentrated than regular food coloring. It’s perfect for baked goods and coloring frosting without affecting the consistency.
Tips and Tricks to Make Perfect Heart Shaped Sugar Cookies
- Use room temperature ingredients to make the dough.
Place the butter and egg on the counter for at least 30 minutes, up to an hour, before starting this recipe.
Softened butter will whip up much easier and a warm egg will incorporate into the other ingredients much faster. You’ll also get a smoother dough overall.
- Keep the dough chilled as much as possible.
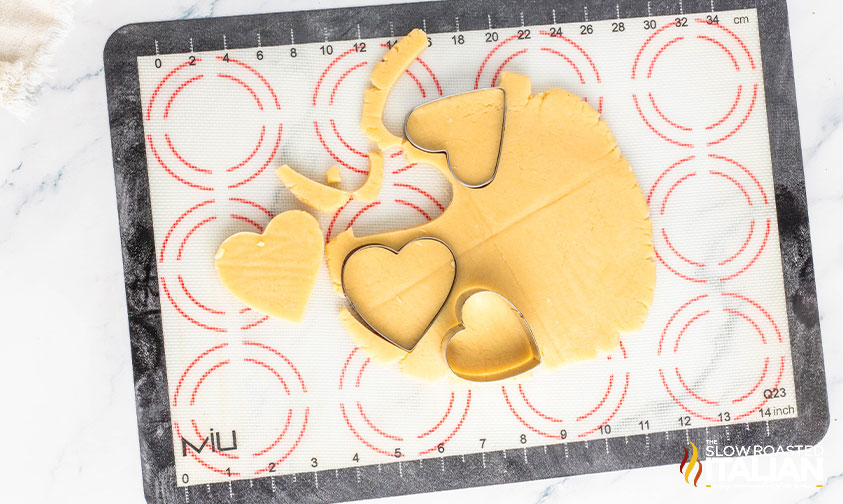
You’ll note that the dough is divided into two pieces, so you can keep one in the refrigerator while cutting out the other.
The more you handle dough scraps, the softer they will become. Pop those back in the fridge if needed before continuing to cut out your shapes!
- Avoid overbaking, which can also happen as they cool!
As soon as the edges are just starting to brown, remove your heart sugar cookies from the oven. But don’t leave them on the pan or they’ll continue to bake.
Instead, carefully slide the parchment or silpat mat off of the pan and onto the counter. Cool there for 5 minutes, then transfer each cookie to a wire rack to finish cooling.
Prep Ahead
- Soften butter
- Bring egg to room temp
- Line baking sheets with parchment
Kitchen Tools You Will Need
- Mixing Bowls – I like to have a variety of sizes on hand, and this set has them all.
- Electric Hand Mixer – I’ve had this one in my kitchen forever, and it still works beautifully.
- Rolling Pin – In a pinch, an empty wine bottle works wonders!
- Baking Sheets lined with Parchment Paper – Used for anything from cookies to roasting, a good baking pan will last for years.
- Cooling Racks – Cool a large batch of treats without taking up a lot of counter space.
- Heart Shaped Cookie Cutter – Use a single size or cut out different sizes for variety!
- Decorating Squeeze Bottles are perfect for icing cookies and there’s less mess too!
Sugar Cookie Heart Decorating Ideas
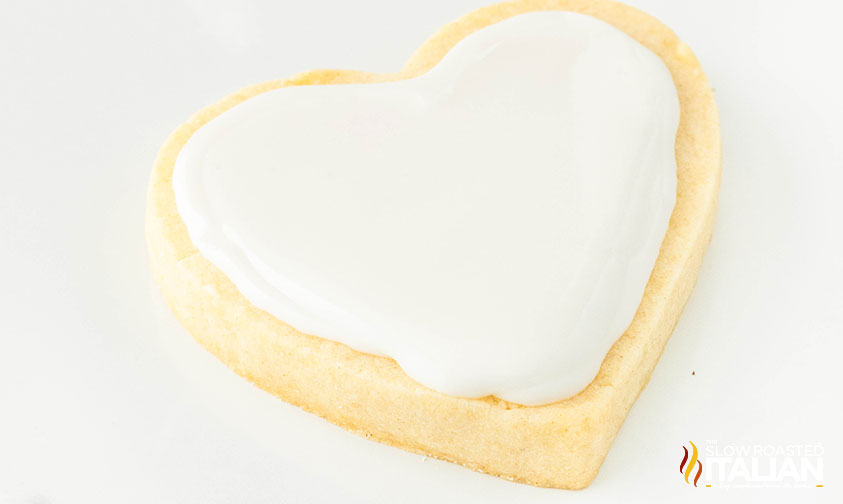
Instead of mixing up different colors to start, adjust the color of the icing as you go! Start with natural white and create outlines or flood the background.
Then, add a little bit of pink or red gel coloring for the next layer. Continue adding more gel as you need deeper and darker colors.
Before you know it, you’ll have a whole batch of frosted heart sugar cookies finished — and only one icing bottle to clean!
As far as designs go, there are so many creative ways to decorate your heart sugar cookies. Here are a few to get you started:
- Simple & Sweet: Pipe a thin border around the outer edge of the cookie (set in just a bit), then fill in the center. This is called flooding and is an easy way to ensure the icing doesn’t run off the sides.
- Create Layers: Flood the cookie for a base color and let it dry. Then, add a different design on top — dots, lines, squiggles, etc. You can keep going, letting each layer dry, until you’re happy with the look!
- Get Intricate: Pipe a tiny heart in the very center of your heart shaped sugar cookies. Once set, pipe a border around the outside in a different color. Repeat until you’ve reached the outer border.
- Add A Little Texture: Include sprinkles in your design, whether they are classic shapes like jimmies or nonpareils, or Valentines-themed shapes like hearts or x’s and o’s. Sanding sugar is an easy way to add a little crunch without taking away from your icing design.
Storing and Freezing Frosted Cookies
Once dry, store your frosted heart sugar cookies in an airtight container for a few weeks. Note that they will continue to soften over time.
Be sure to add a piece of parchment paper between layers so you don’t crush the icing designs!
You can also freeze heart shaped sugar cookies for 2-3 months — frosted or plain.
Flash freeze for at least 1 hour, until firm, then stack in an airtight container. Thaw on the counter before serving.
Frosted Heart Sugar Cookies FAQ
First, you always want to chill your dough! This helps the butter firm back up, causing it to melt slower in the oven, which prevents the dough from spreading.
And if you can, chill your dough twice — before and after cutting out your shapes!
It’s also important to line your baking pans with parchment paper or silpat baking mats. This gives the dough something to “grip” as it bakes, helping it stay in place instead of sliding along a greased surface.
You bet! Instead of placing sugar cookie dough in the refrigerator, pop it in the freezer instead.
Wrap the stacked discs in another layer of plastic wrap before placing them in a freezer-safe storage bag. Or, wrap each disc individually in several layers of plastic.
Use within 1 month and thaw in the refrigerator before cutting out your heart sugar cookies.
The icing will be set enough for decorating in layers within minutes, especially if you have a fan nearby to help!
Otherwise, it can take 4-8 for royal icing to fully harden — it needs to be completely dry before you can stack cookies on top of each other. Using meringue powder helps speed up the process.

Enjoy!
With love, from our simple kitchen to yours.
Don’t miss a thing! Follow us on
Facebook | Twitter | Pinterest | Instagram


Valentine’s Day Heart Sugar Cookies
Ingredients
Cookies
- 2 1/4 cups all-purpose flour, leveled
- 1/2 teaspoon baking powder
- 1/4 teaspoon salt
- 3/4 cup unsalted butter, room temperature
- 3/4 cup granulated sugar
- 1 large egg, room temperature
- 2 teaspoons vanilla extract
- 1/4 teaspoon almond extract
Frosting
- 2 cups confectioners’ sugar, sifted
- 1 1/2 tablespoons meringue powder, not plain egg white powder
- 4 –5 tablespoons water, room temperature
- Red or pink food coloring, gel
- Sprinkles, optional
Instructions
Cookies
- Sift the Flour, Baking Powder, and Salt together into a medium size bowl. Set aside.
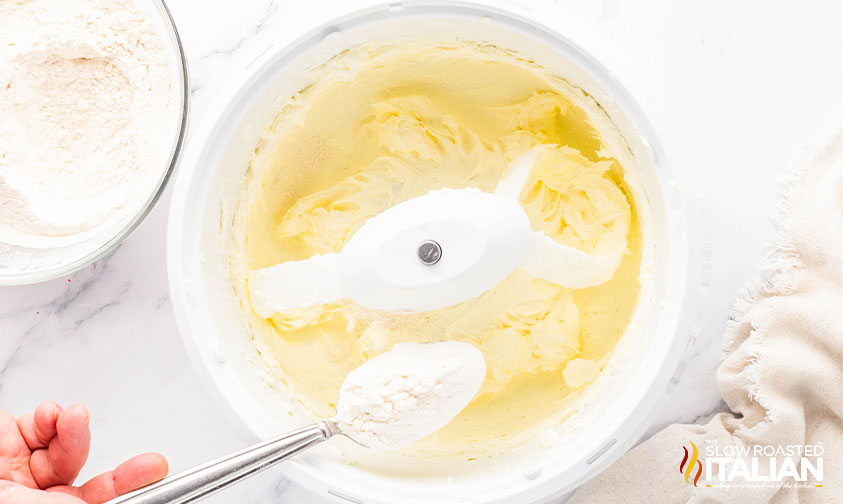
- In a large bowl using an electric mixer (paddles), beat the Butter and Sugar together on medium-high speed until smooth and creamy, about 2 minutes.
- Add Egg, Vanilla, and Almond Extract and beat on medium-high speed until combined, about 1 minute. Scrape the sides of the bowl and beat as needed to combine.
- Slowly add the dry ingredients to the wet ingredients, and mix on low until combined. Dough will be a bit soft, but if it seems too soft and sticky for rolling, add a tablespoon of flour.
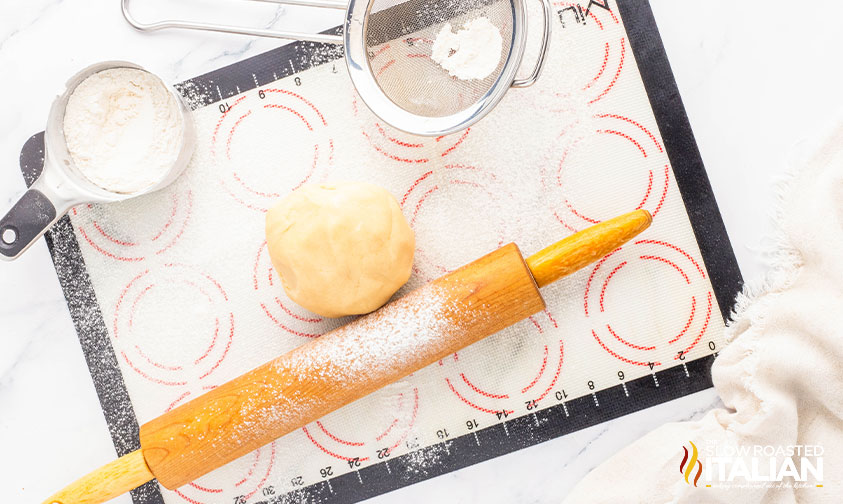
- Divide the dough into 2 equal parts and place each onto a sheet of lightly floured parchment paper or a silicone baking mat. Cover the dough with a separate sheet of parchment paper and roll it out to about 1/4-inch thickness with a rolling pin. Use more flour if the dough seems too sticky.
- Lightly dust one of the rolled-out doughs with flour and cover with parchment paper. Place the 2nd flattened dough on top of it, and cover with plastic wrap, and chill for at least 2 hours.
- When chilled, preheat oven to 350°F. Line large baking sheets with parchment paper or silicone baking mats. Carefully remove the top dough piece from the refrigerator.
- Using a heart-shaped cookie cutter, cut the dough into hearts. Do the same with the second piece of dough. Reuse the remaining dough by rolling it out again, and continue cutting until all of it is used.
- Arrange cookies on baking sheets 2 inches apart. Bake for 11–12 minutes, or until barely lightly browned around the edges (do NOT overbake). Slide parchment paper baking mats from sheets onto counter and cool for 5 minutes, then transfer cookies to a wire rack to cool.
Frosting
- Combine sifted Confectioners’ Sugar, Meringue Powder, and Water in a mixing bowl. Using a hand mixer or a stand mixer, beat the ingredients together on medium high speed for 2 minutes.
- Check readiness by lifting the whisk or beaters off the icing. It should drizzle down and smooth out within 5 to 10 seconds. If it’s too thick, add a tablespoon of water and beat longer. If too thin, beat it more, because it will thicken the more it is mixed. If it doesn’t thicken enough, add a little Confectioners’ Sugar and beat.
- Begin to decorate the cookies by placing a small amount of white frosting in an icing bottle or a small piping bag with a small round tip (#4), and drawing the outline of a heart a small distance from the edge of the cookie. After it sets a little, fill in the middle of the heart design. After a few cookies, add a little pink or red Food Coloring to the bottle or bag, and mix it well. Repeat making your favorite designs on the cookies. Add more Food Coloring and add more designs. Your decorations will go from white, to pink, to dark pink, and to red if you like. It’s up to you. Layer your decorations for fun designs.
- Enjoy with milk or ice cream!
Nutrition
All nutritional information is based on third party calculations and is only an estimate. Each recipe’s nutritional value will vary depending on the ingredients used, measuring methods, and portion sizes.

Originally published January 2025
Disclosure: Posts may contain affiliate links. If you purchase a product through an affiliate link your price will remain the same and The Slow Roasted Italian will automatically receive a small commission. Thank you for supporting us, it helps us keep creating new recipes.


